Our Process
Below is a step-by-step overview of what will take place from the design stage of your inground pool to you and your family actually swimming. Remember, this is a quick overview. When a staff designer comes to your home for a free estimate, they will get into much more detail about each and every stage. If you have any other questions, please call one of our sales offices or send us an email.

Initial Consultation and Estimate
Most likely your initial meeting and consultation will be with the owner of Wimberley Pools & Spas. That’s because Mr. Mark Ledford, owner of Wimberley Pools & Spas, likes to make sure that you are given the very best advice and most accurate information on your pool building options. With many decades of experience in building pools in the Texas hill country, he is the one best qualified to answer all of your questions and give you the most honest and best advice based on that experience.
He will come to your home and answer all of your questions, discuss costs and explain the pool building process. He will also work with you right there on the spot to design your pool exactly how you want it. Coming to your home will give you the advantage of showing the space in which you would like to house your swimming pool. While consulting with you, and utilizing our experience, he will prepare a drawing of your property showing you the exact location of your inground pool.
If you decide to move forward in building your pool, we will explain our contract, come to a final agreement, sign and shake on the deal and then schedule to get your pool building process started.

Excavation
Before we excavate your pool a representative will paint out your new inground pool on your property. This outline will be based on your design and specifications. As soon as you are happy with the layout, we will schedule excavation. One of our expert contractors will use the latest equipment to excavate your pool and get it ready for the rest of construction.
Using a trachoe and bobcat the pool depths are carved into the soil. The pool is over-dug to allow for the very thick shell to be constructed. The excavated soil can be used as backfill onsite or hauled off.

Steel
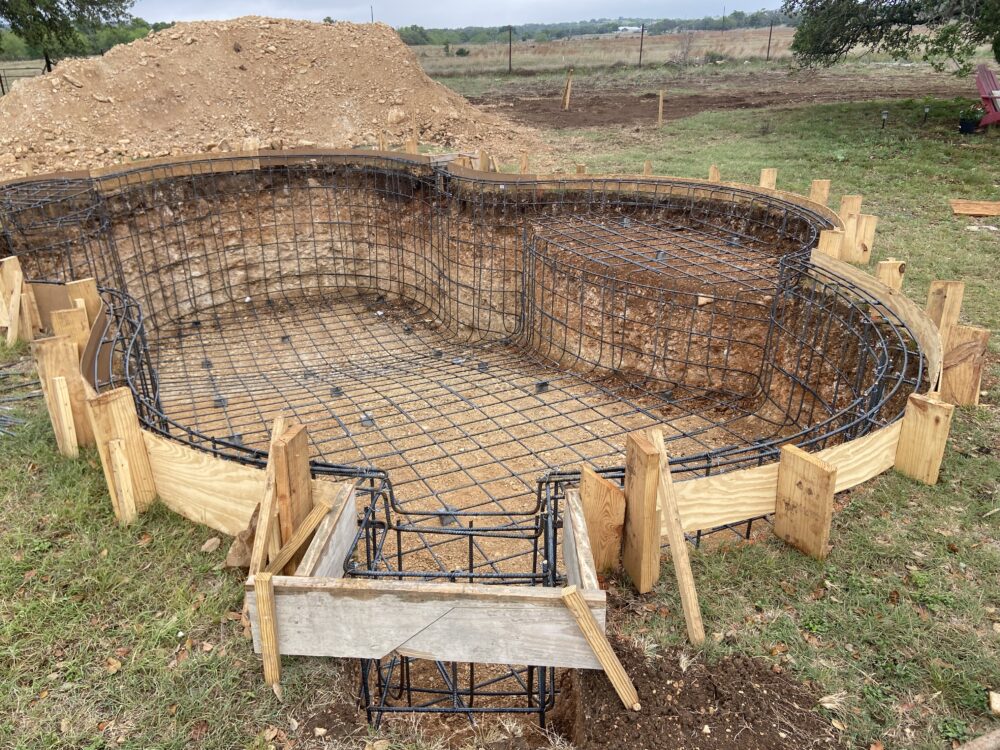
Once excavation is completed, a steel-reinforcing grid is installed to give your pool superior strength. Walls where water depths are greater than 5′ receive additional vertical reinforcement.Steel reinforcing will be put on 8″ centers with 1/2 inch thick steel. We use galvanized connecting wire ties, which adds the unbeatable life to your inground pool. This makes for the strongest possible shell for your pool.
It’s amazing to watch our crews in action as they bend and shape this steel with skill and experience that reflects many years of performing this job.
Plumbing
The plumbing is designed to take advantage of the most efficient equipment on the market today, to keep your pool clean and purified. The pool is plumbed with high-grade PVC pipe, fittings and equipment. These make up the circulation system to your skimmers, main drains, returns, spa jets, waterfalls, and/or to any other special items that you’ve chosen to customize your pool.
Gunite
Now comes the unique process of “shooting the Gunite” to form the hard concrete shell of your pool. Gunite is a mixture of sand and cement that is applied by an experienced team of craftsmen using specialized tools and a Gunite Rig. The sand and cement are mixed dry on-site using a Gunite rig and pumped pneumatically by hose where it is met with water at the nozzle. Our certified nozzlemen will skillfully shoot 6”+ of Gunite around your pool’s steel reinforcement grid to form your pool wall. This combination of Gunite/Concrete and steel reinforcement produces an extremely strong and durable pool shell. Our special mix of gunite is applied under high pressure to bind tightly around the steel. This results in ultimate strength.
The ability to customize your pool or build your pool to any shape, size, or depth desired is the advantage of a Gunite pool.
Allowing the Gunite to fully Set
Once the gunite step is completed, you will need to allow about 10 days for this to fully set before it is sealed with plaster. You will be asked to spray down the gunite structure using a hose or sprinkler two times per day for the next week. This will help the structure to set to its full strength.
Tile & Coping
Coping is installed you’ve chosen your stone. Coping is the stone laid on the top rim of the pool as its edge and can be of precast concrete, brick, stone, or cantilever decking. We offer a wide variety of options for you to chose from. Once you have chosen your stone or coping materials, it is installed around the perimeter of your pool. The coping is professionally set in place and leveled.
The next step in the construction process is the installation of a six-inch wide band of waterline pool tile at the perimeter. This tile is hand-laid and carefully grouted by our skilled craftsmen. It is important that skilled craftsmen handle the tile work as any errors in the straightness or elevation of the tile will be instantly visible by the perfectly straight water line, once your pool is filled with water.
While the work surrounding the pool is being done, the filter system will be installed. The pump, filter, and heater (if desired) will be sized and installed according the filtration/flow requirements. Certified, licensed electricians hook up your main electric service to your pool equipment.

Decking
You can choose from a large selection of deck surfaces and colors to give that perfect finish to suit your surroundings.
Plaster
Plaster is the last step in the construction of your pool; the plaster is a hand-troweled waterproof plaster finish. In one day, after all the surrounding work is complete, the pool walls and floor are finished with a ¼” to ½” thick layer of quartz mixed with plaster. It is hand troweled to a smooth, yet slip resistant surface. This surface must be cared for very closely in the beginning stages after pool completion as the plaster cures. Water chemistry must be maintained and the surface must be brushed frequently to prevent discoloration and reduce mottling. A properly cared for plaster finish does not require painting and can last for many years. When the plaster crew finishes this process, your pool we immediately start filling your pool with water.

Visit
After the pool is filled with water it is time for a representative from Wimberley Pools & Spas to visit you at your home to teach you about the operation and maintenance of your pool.